By Julia Marchand
Hanging around in the bottom of your closet, if you’re anything like the average American, is a mess of outgrown or unloved cast-offs. Accessories that were given to you but aren’t quite your style, or that were well worn during a previous chapter of your life and don’t apply anymore. You’ve acknowledged, at least subconsciously, that you won’t wear them again, but don’t want them to be destined for the trash, so they’ve just stayed there.
Now’s the time to clean out that closet and put your old belts to good use. If you can’t sell them second-hand for someone else to use (maybe they’re broken?), here are a few ways to give them new life.
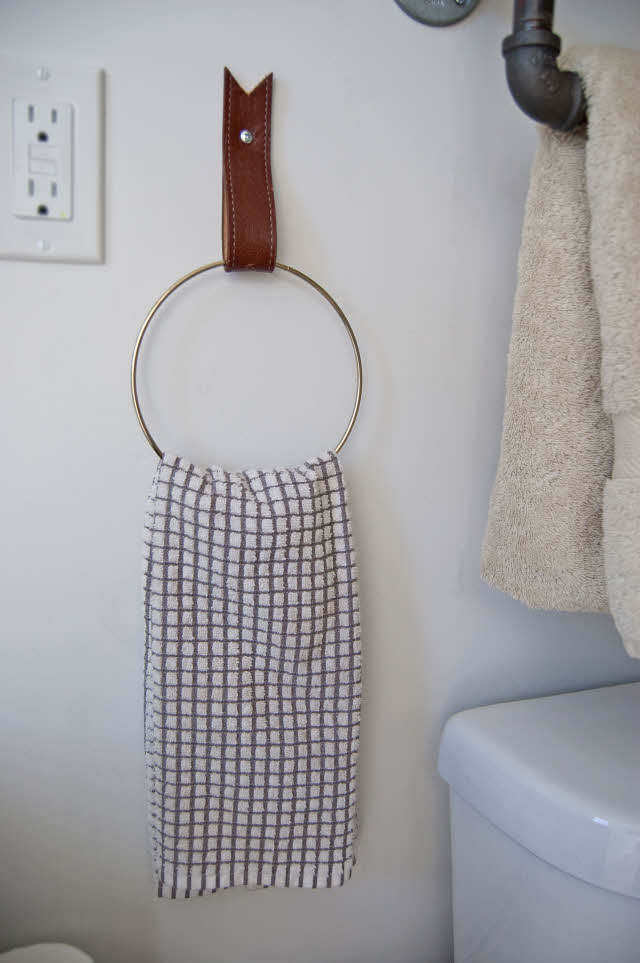
Leather Towel Holder
You will need:
- 1 belt
- 1 metal ring
- 1 screw
- Screwdriver or drill with a screwdriver bit
- Scissors
- Drywall anchor (optional)
This DIY project is sleek and original, but it’s also super easy! Start by folding your belt around a metal loop (if you don’t have anything similar to this shape to reuse from your home, you can buy one at a craft store). Hold it up in the space you want it to hang and decide how big you’d like it to be. You may also want to drape a hand towel through the loop so you can really envision the finished project.
Next, trim your belt to the size you’ve decided will look best. Scissors should do the trick. Feel free to embellish in any way that suits you! Try cutting the top of the belt at a dramatic angle or snipping it into a V shape. It’s your project, after all—customize it to your tastes!
When you’ve got everything cut properly, you’ll have to decide where to put the screw that will hang it. To make the hanging process easier, putting a hole through both layers of leather is necessary. A leather punch is the ideal tool here, but hammering a nail through (with scrap wood behind it) to create the holes will do just fine. Or, if the placement is to your liking, you may be able to reuse the belt’s existing holes!
A stud-finder will help you locate a solid place to hang it, but don’t forget that drywall anchors are an option, too! This one extra step will allow you to affix wall hangings anywhere you see fit, even if there’s no stud. So with a screw and a flourish, your new towel holder will be done!
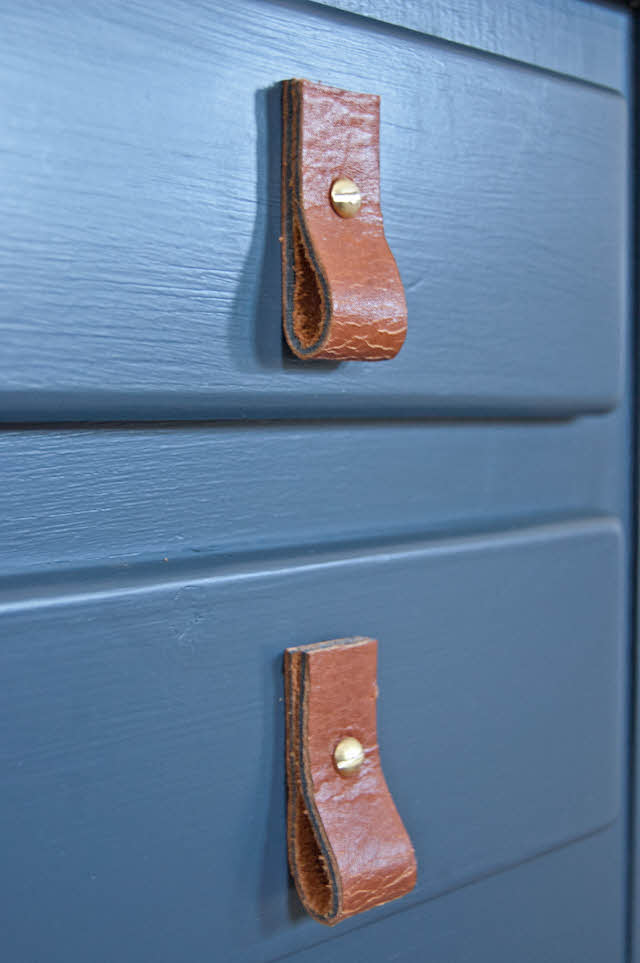
Drawer Pulls
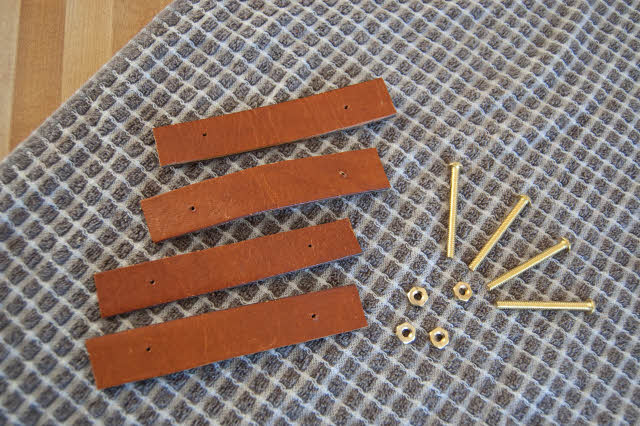
You will need
- 1 leather belt
- Scissors
- 1 screw and coordinating nut for each pull
- Leather punch or hammer and nail
- Screwdriver or drill with a screwdriver bit
This project is especially perfect for the thin belts that are often popular in women’s fashion, and it’s a quick and easy way to update older furniture. If you can breathe new life into an old table or cabinet, that’s one less thing heading toward the landfill! We start this project with the same basic idea as the towel holder: just creating a loop of the right size. Again, hold it up to the space you’re trying to fill and decide what looks right to you.
Trim it down with scissors, again, and punch holes in the leather just as before. Use this first loop you’ve created as a template for any additional pieces you need. When you have all of the leather pieces ready, instead of drilling them straight into the drawer, you’re going to use the holes that are present in the drawer from the previous hardware or fill the old ones and move the location of pulls by pre-drilling new holes.
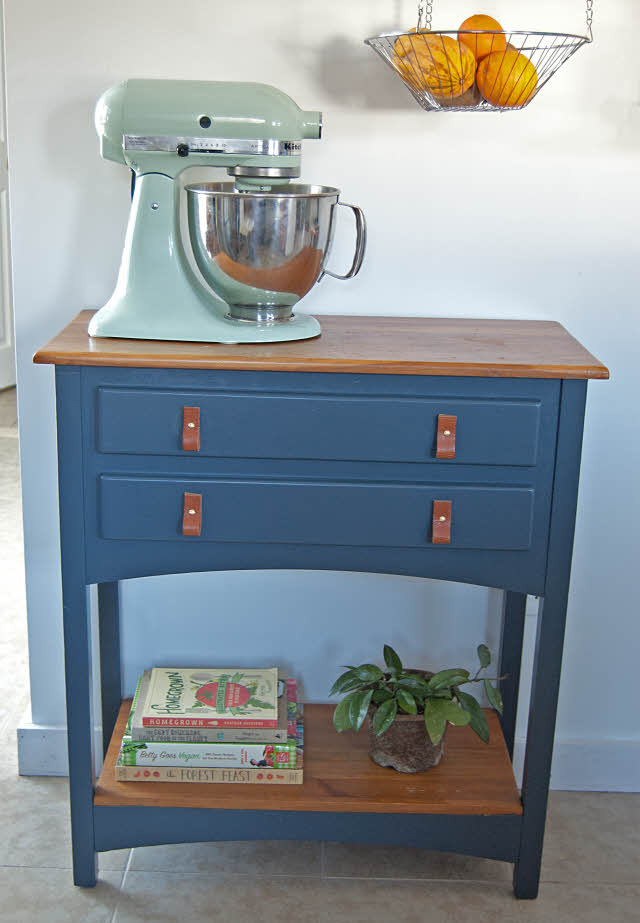
Thread both layers of the belt through a screw then screw this into the drawer’s hole and secure it on the inside of the drawer with a nut. Repeat for any other drawer pulls and you’re finished!
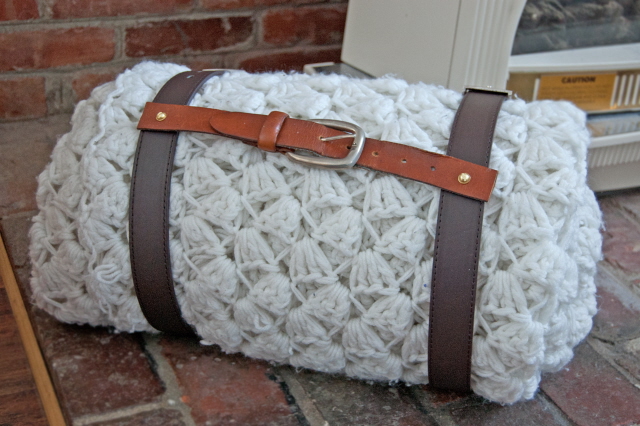
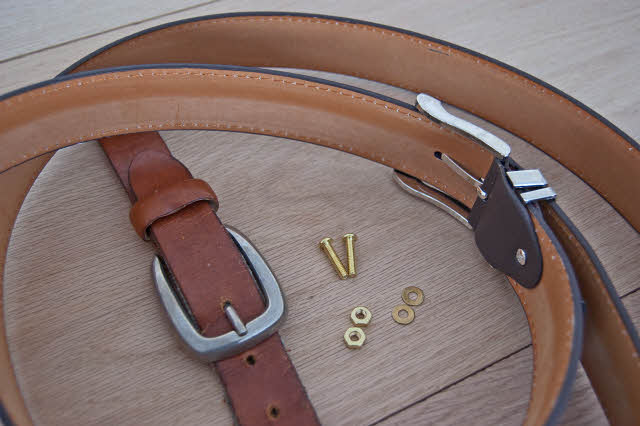
Firewood or Blanket Caddy
You will need:
- Two belts
- Strip of leather, canvas or something similar for the strap
- 2 short screws, coordinating washers, and coordinating nuts
- Leather punch or hammer and nail
For anyone who camps, a blanket carrier is a lifesaver. Being able to roll up your bedding and loop it through the bottom of your backpack so you aren’t wasting space inside it is essential. A carrier like this could also attach to a bike basket for those who travel on two wheels, but appreciate knowing they’re ready for spontaneous picnicking, too. Here’s how to make this versatile caddy.
Begin by adjusting your two belts to fit snugly around the blanket you’re making it for. You may need to add an extra hole to one or both, so use your leather punch or our hammer and nail trick for this part. While you’re at it, add one more hole in each belt where you’d like the strap to be and two in the strap (if necessary) to match.
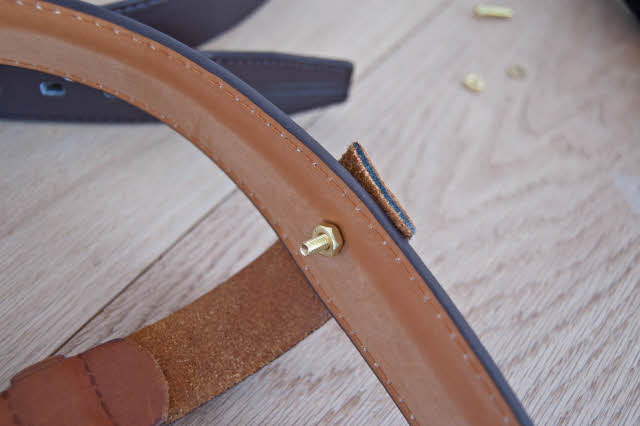
Then it’s as simple as threading a washer onto a screw and winding it through the holes you’ve created to bring the belt and strap together. The washer will prevent the leather from tearing or stretching around the screw head with lots of use. Fasten the screw in the back with a nut and do the same for the other side! Simple as that, your carrier is ready to go! Just be careful to unbuckle the belts to remove the blanket rather than pulling it—the screw could get stuck in the fabric.
Although a belt is a seemingly insignificant cast-off, it is surprisingly useful with a little imagination and time. Are there any other uses for old belts that you’ve come up with?
Julia Marchand loves the challenge of turning abandoned apparel into helpful household items. She writes about her sustainable creations for eBay.com, a great place to buy and sell those lightly worn items.
Daniel Oliveira
this are all super neat!