When we use the term “upcycling,” we’re almost always discussing creative reuse of materials by the crafty set: folks that have a sewing machine, and pinking shears, and a hot glue gun at the ready. But there’s no reason that the techie crowd can’t get in on this game: in fact, these are the folks that still have old Sega Genesis consoles buried somewhere in a closet because they might come up with something to do with it one day. All they need for this electronic waste is some “brains” to power their vision…
The Raspberry Pi has served this purpose for numerous techie repurposers: the credit card-sized computer can fit neatly into just about any casing you choose (or create), and, with a little solder, can bring those old parts back to life in a new, creative configuration. The Raspberry Pi foundation has ideas on hand for their cheap, open-source computer… but hackers around the world have bought a Pi, pulled some junk out of the closet, and started tinkering. Here are some of the projects I came across after some brief searching…
5 Projects for Transforming Electronic Waste with a Raspberry Pi
1. The Retro Gaming Station: Yeah, I hinted at this. The console and/or controllers actually just add an element of nostalgia, though: you can set this up without any of the original hardware. Lifehacker has detailed instructions, and this great overview video:
2. Build a Laptop with Some of that Electronic Waste in the Closet: To some degree, this play right into the purpose of the Raspberry Pi: a cheap computer that be plugged right into a monitor and keyboard. If you’ve got an old laptop, or even just parts from one, you can upcycle it all back into a working system for just the cost of the Raspberry Pi. The complete plans are available at Bit Rebels; here’s the short video version:
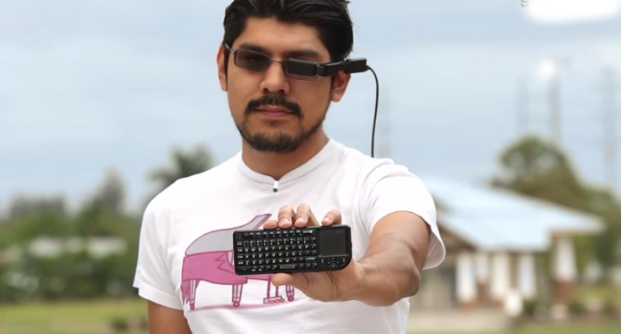
3. Turn Old Sunglasses into DIY “Google Glass”: Not ready to pay out the exorbitant price for Google Glass? Yeah, me, either… but the whole wearable computer/display thing is kind of cool. If you’ve got an old pair of glasses laying around, you can create your own wearable video display for between $100-200. Instructions and 3D printing files are available at adafruit… and, yes, they’ve got a video, too (via Pinterest):
4. The Web Radio with an Old-School Look: OK, this is probably my favorite of the bunch. Dominic Buchstaller turned this radio he found at a flea market into a web radio for his kitchen with a little elbow grease and a Raspberry Pi. Direction are at his website; here’s the video (via Hack A Day and Pinterest):
5. The Emulation Station Thingie: OK, I’m going to be real honest: I’m not sure I quite get this one. Essentially, the creator is emulating an old Commodore 64 with the computer… but the case itself looks mighty cool. I suppose that’s mainly what it does… but correct me if I’m wrong. No video here, but lots of pictures…
I’m not a techie maker, so there may well be insights and details I’m missing here; I do think these projects are awfully cool, though. If you know more than I do, tell me…
Image credit: screen capture from “DIY Glass – Wearable Video Display” video

